Hits: 2
- For photographers who prefer to make simple enhancements, Camera RAW can be all you need.
- You have greater scope to rescue exposure problems, adjust white balance and pull detail out.
- You can tweak a setting, change a crop or alter the look of the image at any time.
Get to grips with the best RAW editor
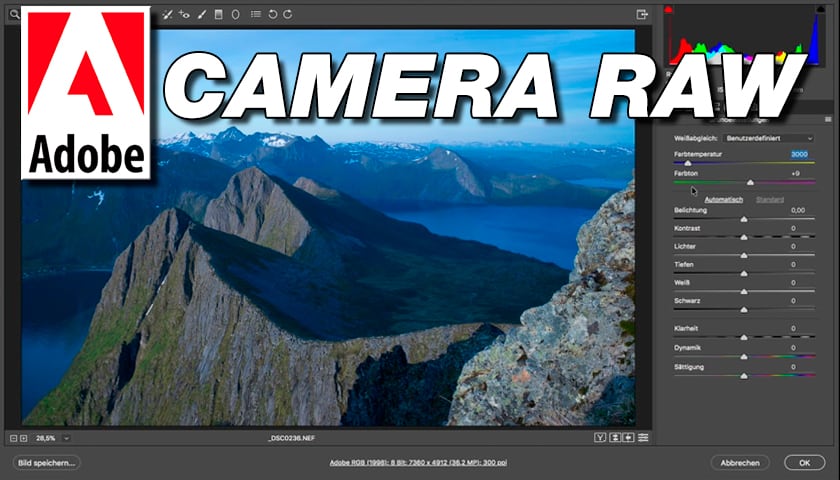
RAW editing has improved dramatically over the last few years – and Adobe Camera RAW leads the way. Photoshop’s dedicated RAW processor offers a combination of simple tools, powerful settings and great depth of features. Over the next lines, we’ll explain everything you need to know about Camera RAW – from basic editing and workflow advice to essential image enhancing tools and amazing features like the brand-new Super Resolution command …
WHAT IS Camera RAW?

RAW files require processing before they can be edited in Photoshop. Camera RAW is Photoshop’s RAW processor. It allows you to set white balance, crop photos, enhance colors, make tonal changes and powerful local adjustments. As such, it’s invaluable for many essential editing tasks. By contrast, the main Photoshop editor gives you more depth in terms of working with layers, creating special effects, compositing and more. But for photographers who mainly prefer to make simple enhancements, the tools in Camera RAW can be all you need.
These tools and settings are almost identical to those in the Lightroom Develop Module, so it’s easy to switch between the two.
WHY CAN’T I JUST SKIP RAW AND USE JPEGs INSTEAD?
It’s perfectly fine to shoot and edit JPEGs, and many photographers can produce stunning images without needing to turn to RAW. But there are things to be aware of. JPEGs might look fine straight out-of-camera, but once you begin to perform edits – say a boost in contrast, a change to the brightness or an increase in color saturation – the cracks may soon start to show. Banding can occur in tonal gradations, and artifacts may be amplified.
By contrast, a RAW contains all the fresh image data that your camera is able to record, which gives you greater editing headroom. You have greater scope to rescue exposure problems, adjust white balance and pull detail out of highlights and shadows. As such, it’s best to do as much of your editing as possible on the RAW file; if you need to output a JPEG, do so at the end of your workflow.
HOW DO I OPEN A RAW FILE?
When you attempt to open a RAW file into Photoshop, it’ll automatically open in Camera RAW first. You can also open files into Camera RAW directly from Bridge by right-clicking and choosing Open in Camera RAW (Photoshop needn’t even be open to launch Camera RAW from Bridge, which saves on processing power). What’s more you can also open JPEGs and TIFFs into Camera RAW in this way, and enjoy all its editing tools.

WHY DON’T I HAVE TO SAVE RAW EDITS?
After making your changes in Camera RAW, you can simply click Done to exit Camera RAW; click Open to continue into Photoshop; or right-click and select Save Image to save a different file format. Any changes you make will be remembered next time you open the RAW in Camera RAW or Lightroom. RAW files are impossible to save over. They can only ever be added to with other tiny bits of ‘sidecar’ data, held in a separate file. This extra data sits alongside the original data, and tells the software how the file should look when opened. This is sometimes called parametric editing.
WHAT’S PARAMETRIC EDITING?
Rather than altering the pixels that make up the image, we instead alter a set of parameters that affect how the image is presented. The beauty of parametric editing is that every single change you make is completely non-destructive. You can tweak a setting, change a crop or alter the look of the image at any time. What’s more, you can copy edits from one image to another – or an entire set – with ease. Image editing is rarely a straightforward journey.

Camera RAW brings a creative freedom to that journey, as you’re free to try out different treatments or retrace your steps whenever you choose. With parametric editing, the journey can take as many diversions as you like before you settle on the destination.
Sometimes this might mean continuing working on the image in Photoshop, but often you can do everything you need in Camera RAW, then export the photo in its final format.
Five reasons why RAW trumps JPEG

1- HIGHLIGHTS AND SHADOWS: RAWs hold more detail in the highlights and shadows; this is good for landscapes, as it can often be a challenge to record detail in the brightest and darkest parts of the frame.
2-WHITE BALANCE: With RAWs you can set the white balance after the fact, so you don’t need to worry about getting it absolutely perfect in-camera: you’re free to fine-tune it later on. You can make a sky warmer or cooler with ease.
3-GRADUATED TONES: Heavy editing of JPEGs will lead to an unsightly banding effect in areas of gradation where light tones transition to darker tones – this is very unlikely to happen with RAW files.
4-DETAIL CONTROL: You can pull greater detail out of RAW files as there’s more headroom for editing; and, unlike JPEGs processed in-camera, you have ultimate control over the strength of sharpening.
5-MORE INFORMATION: An 8-bit JPEG holds 256 levels of luminosity per color channel. A RAW is usually 12 or 14- bit, which means either 4,096 or 16,384 levels of luminosity. Higher bit-depth means smoother gradations and less chance of banding.
KEY FEATURES

1 PROFILE BROWSER: The Profile Browser offers a range of excellent starting points for editing your RAW photos, including themes such as Adobe Landscape and Adobe Portrait. The Camera Matching set mirrors the picture style options on your camera.
2 BASIC PANEL: The Basic Panel is the place to begin making enhancements to tone and color. Start at the top and work your way down the sliders. Many work in combination with the Alt key to give you a handy grayscale view.
3 TOOLBAR: The toolbar on the right edge lets you access the Crop Tool, local adjustment tools, presets and more. When you click on a tool, the panel view changes to show the specific tool settings. The top icon will bring you back to the regular panel view.
4 WHITE BALANCE SETTINGS: This control allows you to set a white balance preset after the fact, just as if you’d used the new white balance setting at the time of shooting. You can use the Tint and Temperature sliders to fine-tune the white balance, either to correct a color cast or add a creative shift.
5 FILMSTRIP: When you open a set of photos into Camera RAW they’ll show in the Filmstrip. You can hide or view it by clicking the icon here. Rightclick the image thumbnails to sync, edit or save files. The Filmstrip can be set horizontally or vertically, and you can turn off file names and ratings if you like, for a larger view of the images.
6 PANELS: You can access a host of image settings here, from lens correction tools to sharpening and color grading. The best way to learn these settings is simply to dive in and experiment. Remember that every setting is reversible, so you can see how they affect your image without making permanent changes.
SUPER RESOLUTION
This new feature employs machine learning to double the resolution of your photos. It works brilliantly on low-res images, so it’s great for improving old photos or low-quality rights-free images. Open an image in Camera RAW, then rightclick the image or the filmstrip thumbnail (or select several at once) and choose Enhance. If it’s a RAW file, the feature will apply RAW Details enhancement as well as Super Resolution. It’ll also give you an estimated completion time. Once complete, you’ll find a new Adobe DNG file alongside your original image file, with the suffix ‘-Enhanced.dng’.


